Views: 0 Author: Site Editor Publish Time: 2025-08-08 Origin: Site
Yes, you can put in a bathroom vanity and faucet by yourself. You only need to measure your space and choose the right style. Many people save $200 to $1,000 on labor when they install a bathroom vanity themselves. Look at these common faucet types:
Faucet Type | Best For |
|---|---|
Single-hole | Small, modern bathrooms |
Centerset | Compact spaces |
Widespread | Large, elegant bathrooms |
Putting in a bathroom vanity and faucet can save you $200 to $1,000. You need to measure your space well so it fits right.
Get all the tools and materials you need before you start. Being ready helps you work faster and make fewer mistakes.
Always check if your vanity is level and make sure it is secure. Use shims if you need to and tighten all plumbing connections to stop leaks.

Get all your tools and supplies before you start. This helps you work faster and makes things easier. Here is a list to help you get ready:
Power drill and bits
Stud finder
Hole saw kit
Utility knife
Adjustable wrench
Basin wrench
Tape measure
Caulk gun
Bucket
Cleaning cloths
Cleaning gloves
Eye protection
Bathroom vanity
Caulk
Plumbers tape
Plumbers putty
Tip: Wear gloves and safety glasses before you begin. This keeps your hands and eyes safe from cuts and splashes.
Make sure your new vanity fits the space. Measure the area with care. Remember to check the countertop overhang. It helps keep water off your walls. Open the doors and drawers to see if they have enough room. Look for uneven floors or wall studs. These can make installation hard. If you want a wall-mount vanity, check if the wall is strong. Make sure your faucet works with your plumbing. Wall-mounted faucets need special steps. If you feel unsure, ask a professional for help.
Finish/Material | Description | Popularity Trend |
|---|---|---|
Brushed Nickel | Warm, fancy, used in expensive homes | More popular |
Black Bathroom Faucets | Matte, stylish, matches many looks | Very popular in 2024 |
Chrome | Cheap, gets dirty easily | Less popular |
Matte/Satin Finishes | Soft shine, easy to clean, spa-like look | Becoming popular |
Be safe first. Turn off the water valves under the sink. Turn on the faucet to let out any water left. Use a wrench to take off the supply lines and drainpipe. If you see wires, turn off the power and disconnect them. Put a bucket under the pipes to catch water. Cut the caulk around the sink and countertop. Lift them off the cabinet. Be careful when moving heavy things. If you want a wall-mount vanity, clear the space and find the wall studs before you begin. Now you are ready to put in your new bathroom vanity.

Ready to install a bathroom vanity? Start by placing the new cabinet in position. Make sure it sits flush against the wall. Use a 2-foot level to check if it stands straight. If you see any wobble, grab some shims and slide them under the corners until the vanity feels steady. Stack shims if you need more height. Always check for level again before you move on.
Now, secure the vanity. Find the wall studs using a stud finder. Drill pilot holes through the back of the vanity into the studs. Use screws to anchor it. If your vanity comes with mounting brackets, follow the instructions from the manufacturer. For a wall-mount vanity, you need extra care. Mark the width above the plumbing. Measure 34 1/2 inches from the floor for the top of the brace if your countertop is 36 inches high. Use a level to draw lines for the brace. Cut notches in the studs for extra support. Wall-mount vanities need strong walls, so check for solid backing before you hang anything.
Tip: Always measure twice before you install a bathroom vanity. This helps you avoid gaps or fitting issues. Choose the right height for comfort. If you feel unsure about plumbing or wall strength, ask a pro for help.
Common challenges can pop up during installation. Here are a few and how you can handle them:
Measuring incorrectly can lead to big problems. Double-check your numbers.
Wall-mount vanity units need strong support. Add braces if your wall feels weak.
Plumbing issues can cause leaks. If you feel stuck, call a plumber.
Poor ventilation can lead to mold. Keep your bathroom dry and air moving.
Cheap materials can warp or peel. Invest in quality for a longer-lasting vanity.
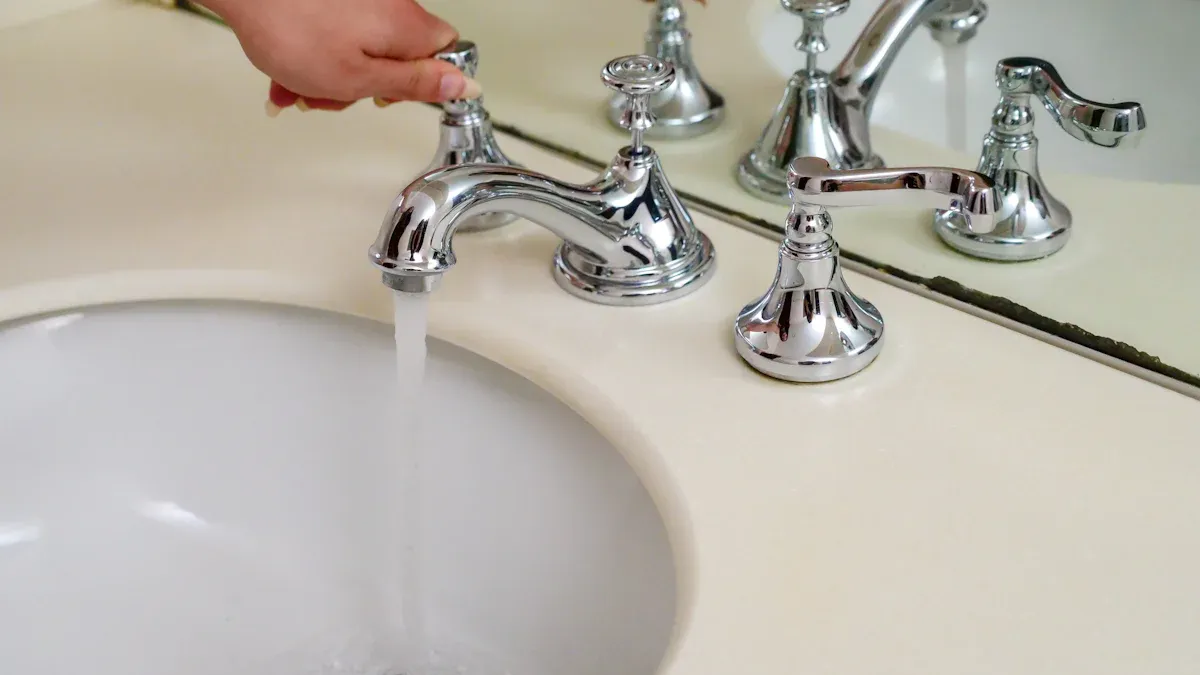
Before you install the vanity top, install faucet in the vanity. This step makes things easier because you have more space to work. Most people find single-hole and centerset faucets the easiest to handle. These types fit well and need fewer steps.
Follow these steps:
Pick the right faucet for your sink. Check the holes in the vanity top.
Clean the area where you will install the faucet set.
Insert the faucet through the holes. Use the washers and nuts that come in the box.
Tighten the nuts by hand first, then use a wrench for a snug fit.
Attach the supply lines to the faucet. Wrap threads with plumber's tape to stop leaks.
Note: Always follow the manufacturer's instructions for your bathroom faucet. Each model can have small differences.
If you want to save water, choose a water-efficient bathroom faucet. These models help protect the planet and lower your bills.
According to experts, water-saving faucets help fight water shortages and reduce energy use for water treatment.
Now you can install a bathroom sink. The method depends on your sink style. Here are the most common types:
Undermount sinks: These go under the countertop. Apply a bead of 100% silicone sealant around the edge. Lift the sink into place from below. Hold it until the sealant grabs. Wipe away extra sealant.
Vessel sinks: These sit on top of the counter. Place the sink over the drain hole. Some vessel sinks need a small cutout for stability. Use silicone sealant to keep it in place.
Drop-in sinks: These drop into a hole in the countertop. Run a bead of silicone around the rim. Lower the sink into the hole. Press down gently to seal.
Tip: Use a silicone sealant made for kitchens and baths. It keeps water out and stops mold. GE Pro Seal Max and GE Advanced Silicone are good choices.
If you need to replace a bathroom sink, follow the same steps. Remove the old sink, clean the area, and install the sink using the right method for your style.
You are almost done! Now connect the plumbing. Attach the water supply lines to the faucet. Use an adjustable wrench to tighten them. Connect the P-trap to the drain. Make sure all connections feel snug but do not over-tighten.
Common plumbing setups include:
A pipe from the sink straight to the wall.
An offset wall outlet that needs a flexible tube.
Floor outlets that need extra parts.
Dual sinks that use a center outlet tee.
After you connect everything, turn on the water. Check for leaks under the sink and around the faucet. Dry all surfaces first. Run water and watch for drips. Use a moisture meter if you want to check for hidden leaks.
Troubleshooting tip: If you see a leaky faucet, check the cartridge or clean out mineral deposits. Low water pressure? Try cleaning the aerator or removing the flow restrictor if the manufacturer says it is okay.
Seal the edges where the vanity meets the wall. Use a caulk gun and run a smooth bead of caulk. This keeps water from getting behind the vanity and causing damage.
Cause of Damage | Prevention Strategy |
|---|---|
Improper Installation | Follow the manufacturer's guide or hire a pro. |
Poor Quality Materials | Choose solid wood or stone for better durability. |
A well-installed bathroom vanity can last up to 60 years if you use good materials and take care of it. Aquacubic has years of experience in bathroom and kitchen products. They love helping people create beautiful, lasting spaces. If you want more tips or need quality products, reach out to their team.
Remember: Wall-mount vanity units need extra support. Always check the wall before you install a bathroom vanity or attach a sink to a vanity.
Ready to enjoy your new bathroom? You did it! If you run into trouble, do not hesitate to ask for help.
You did it! You installed your bathroom vanity and faucet like a pro. Before you finish, check these key points for stability and safety:
Make sure the vanity sits level and secure.
Tighten all plumbing connections.
Turn on the water and look for leaks.
If you notice low water pressure, clogs, or water stains, call a plumber. Keep your vanity clean by wiping it daily and using gentle soap. Got questions or want more tips? Explore Aquacubic for more inspiration!
You can finish most installs in 2 to 4 hours. If you run into plumbing issues, it may take longer.
Try these quick fixes:
Add shims under the corners.
Check the floor for bumps.
Tighten screws again.
Yes, you can reuse it if it fits the new sink holes and works well. Clean it before reinstalling for best results.
