Towel bar: Towel bar is used to hang towels. The installation position is generally a position closer to the bath, and the installation height is generally 1.4 to 1.6 meters from the ground. The installation height should not be too low, otherwise the towel will get wet when bathing. The installation methods of the towel bar can be summarized into two types, one is to install without punching and the other is to install with emptying. Hole-free installation methods generally include vacuum suction cup type and watering type. Screws are generally used for drilling holes. Nowadays, many families prefer the non-punch vacuum suction cup installation, because it is easy to install, fast, and does not require much effort when disassembling. It does not cause any damage to the wall, but after a long time, it is easier to loose and fall off. The fixing force is not as strong as screwing. The watering type, as the name implies, is fixed on the wall with nail-free glue. It takes more time to install, but the cost savings are better than others.
Towel rack: The towel rack is used to place bath towels. The installation location is next to the towel bar or in an open position in the bathroom. You can design the installation location according to the characteristics of your own bathroom. The length and width of the bath towel are several times that of the towel. The height of the installation is naturally higher than that of the towel bar, but it mainly depends on the average height of the family members.
Toilet paper holder: The toilet paper holder is used to place toilet paper. It is generally installed next to the toilet. The installation position should be lower than the toilet. If it is installed higher than the toilet, you can imagine how inconvenient it is.
Toilet brush holder: The toilet brush is generally installed next to the toilet, and it is recommended not to install it next to the toilet paper holder. The toilet brush usually contains bacteria when cleaning the toilet, and then the air around the toilet brush has many bacteria, and the bacteria are easy to adhere to the paper towel.
Storage basket: The storage basket is generally installed near the shower, and is used to place items such as shower gel and shampoo for easy bathing. The installation height is generally one meter two to one meter four. These are just for reference, and are of no practical use. You can design according to your own habits and believe in yourself.
Clothes hook: The characteristics of stainless steel clothes hooks are reflected in high temperature and low temperature resistance according to physical properties, and corrosion resistance and not easy to rust according to chemical properties. They are expensive and expensive, and are suitable for bathroom use. Space aluminum clothes hooks are characterized by not easy to fade, good environmental performance, not easy to rust, and easy to dye. The clothes hooks made of space aluminum materials on the market are rich in colors, strong in decoration, and low in price. The disadvantage is that the pressure resistance is weak. Not suitable for hanging heavy objects, suitable for various places. The copper clothes hook itself has high material density and good stability, so it is not easy to rust, resists pressure and is heavy, and is more expensive in the market. It is suitable for kitchens, living rooms and other places. Aluminum alloy is made of pure aluminum with some alloying elements, so aluminum alloy hooks are slightly better than space aluminum hooks in terms of performance. Zinc alloy is an alloy formed by adding other elements based on zinc, so zinc alloy clothes hooks are characterized by good manufacturability, long use time and easy cleaning. Wooden clothes hooks have low immunity to humid environments, poor physical properties, but strong decoration, suitable for living rooms, bedrooms, study rooms and other locations. Plastic clothes hooks are easy to mold, so most of the plastic clothes hooks on the market are not only highly decorative but also low-cost. The disadvantage is that the surface is not resistant to dirt and it is inconvenient to clean.
When we buy, we must consider the actual situation at home. Choose the right size and the required rack. Don't buy the package blindly. Some things may not be useful.
The bathroom is full of water vapor after taking a shower? The bath water splashes on the ground? Sometimes you slip and fall accidentally? The bathroom without separation of wet and dry is simply maddening. The separation of wet and dry is an unavoidable matter in the bathroom. As long as we have a slight requirement for the quality of the bathroom, we will immediately take care of this matter. Because the separation of wet and dry in the bathroom is a very cost-effective job, it will make your bathroom life full of happiness in minutes. How to achieve the separation of dry and wet in the bathroom? For small-sized bathrooms, the partitions are too narrow, and they cannot be separated from wet and dry. Very tangled. So how to separate wet and dry in a bathroom of only about 5 square meters? Let's analyze how to separate wet and dry in a small bathroom!
Separated by Shower Curtain
The shower curtain is the simplest and most beautiful way to separate wet and dry in the bathroom. It can be said to be a must-have artifact for the bathtub. Use a shower curtain to separate the dry and wet areas of a small apartment, which is the most trouble-free and cost-effective. Whether it is an arc-shaped corner, or directly draw a straight line, make a water retaining strip and hang a shower curtain. It is very convenient. You can also frequently change the style of the shower curtain to a different style. But the disadvantage is that it cannot effectively block water vapor, and it is easy to grow mold and needs to be cleaned frequently.
Glass Partition
Compared with the shower curtain which can not effectively isolate the water vapor, the shower door is much more practical. More suitable for bathrooms equipped with showers. The shower door is mostly made of glass. Glass partition is a better choice. On the one hand, because the glass is transparent, it does not appear to be visually narrow. Second, because the glass has better water resistance, the effect of wet and dry partitions will be better.
Half Wall Partition
For small apartments, this is also a good choice. Not only can it perfectly achieve the purpose of separating dry and wet, but also use the half wall to create its own style. Pasting retro-style or modern-style tiles on the wall can play a decorative and beautifying role.
The water pipe under the sink does not contact the floor.
In addition to working on the door, you can also separate wet and dry in places such as sinks and basins. The important point is to not to touch the floor! Bathroom furniture that is not exposed to water stains is less likely to be corroded, which increases the service life and is also easy to clean.
Move the Sink Out
The most complete wet and dry separation is to move the sink directly outside the door. Use part of the outside space to make the shower area inside the bathroom more spacious. In addition, the external washbasin also allows a family to wash without interfering with each other. The vanity and sink are placed outside the bathroom. Completely cut off the moisture in the bath. Small apartments can also use the walkway outside the bathroom to do so!
Do you like the bathroom with separate dry and wet function? The dry area and wet area of the bathroom are perfectly separated, which not only partitions the space, but also is visually more fashionable and rich in spatial level. Wet and dry separation has gradually become mainstream in bathroom design, so hurry up and give it a try!
When decorating kitchens and bathrooms, many people worry about whether to choose an above counter sink or an under counter sink. The above counter sink and the under counter sink have their own advantages and disadvantages. Which one to choose depends on your own preferences.
There is a difference between the definition of the above counter sink and the under counter sink in the kitchen and bathroom, we will analyze them separately.
Kitchen Sinks
Above Counter Sink:
Above counter sink installation is the most common and simplest. The opening size of the countertop is slightly smaller than the size of the sink, so that the sink can be placed on the countertop, and then a circle of glass glue can be applied around it.
Advantage
The above counter sink is easy to install, and there is no need to worry about deguming if the load is too heavy. It is also convenient to change the sink later, just scrape off the glass glue and replace the sink. The space left under the sink can be about 3 cm higher than the under counter sink.
Disadvantage
It is inconvenient to clean the countertop in future use. The sides of the sink and the countertop are sealed with glass glue. After a long time, the glass glue is easy to mold and turn black.
Under Counter Sink:
There are also two ways to install the under counter sink. One is to make a hole on the counter slightly smaller than the outer edge of the sink. The other is to cut a hole according to the inner edge of the sink.
Advantage
The under-counter sink is very easy to take care of, and the countertop is easy to clean. It is integrated with the countertop and more concise.
Disadvantage
Relatively speaking, the installation of the under-counter sink is more troublesome. The gap between the countertop and the sink is bonded with a strong adhesive. If you want to replace the sink, you may need to replace the countertop as well. In addition, no matter how strong the glue is, and the load-bearing capacity is uncertain, there is a risk of falling from the counter. General washing and load-bearing of pots and pans will not cause problems.
Bathroom Basins
Above Counter Basin
The basin above the countertop is called the above counter basin. The installation of the above counter basin is relatively simple, just cut a hole on the countertop according to the installation drawing. Then place the basin in the hole and fill the gap with glass glue.
Advantage
Above counter basins are more beautiful in shape and have a wide variety of types. You can choose according to your favorite style. Easy to install and remove. If you want to replace it with a new basin, you can directly remove it and install a new one.
Disadvantage
One is that it is troublesome to clean the countertop, and there is a hygienic corner between the basin and the wall. The second is that the glass glue is used to bond the basin and the countertop, and the glass glue is easy to turn black or mildew after a long time.
Under Counter Basin
Advantage
The biggest advantage is that it is easy to clean, and there will be no hygienic dead angle. The basin area is more clean and tidy.
Disadvantage
Similar to the kitchen sink, it is still a problem of installation and replacement. And the style of the under-counter basin is fixed, so it is impossible to make more choices in the shape.
In summary, the above counter basin and the under counter basin have their own advantages and disadvantages. Simply put, people who want to clean more easily can choose under counter basins in both the kitchen and the bathroom. For the convenience of installation and replacement, or for those who have styling requirements for the bathroom, an above counter basin can be selected.
Kitchen Design
When designing a functional kitchen, the rule of triangles should be kept in mind. That is, the sink, stove and refrigerator are arranged in a triangle. The L-shaped kitchen fits this triangle shape very well. The L-shaped layout is most suitable for small and medium-sized kitchens. The first-class kitchen is not only about the layout, but also about creating delicious food through the inspiration of the right layout.
1. The large patterned backsplash and striped floor are the highlights of this colorful kitchen. A small semi-circular breakfast bar is set up on one side of the room, allowing guests to have conversations with busy chefs, or have a quick snack or a morning coffee here.
2. This red kitchen has an open shelf filled with useful decorative items.
3. Colorful furniture and hardware accessories work well when paired with white or light-colored upper wall cabinets, so as not to oversaturate the space.
4. Since the L-shaped kitchen only uses two walls, they naturally open up the space. This is an ideal kitchen, a natural connection with the living room or dining room.
5. Using eye-catching design features, a black wall cabinet is installed on one wall of the kitchen. Formed to correspond to the light-colored cabinet on the other wall.
6. By adding carpets, the space feels more rectangular. Place a tall decorative vase on the floor at the end of the floor-to-ceiling cabinet to soften the appearance of hard edges.
7. If the budget allows, please use some retractable doors to replace the kitchen wall on one side, leading directly to the outdoors. The added natural light and space to overlook will truly change your kitchen.
8. A large floor-to-ceiling window with a view of the garden can also bring great satisfaction. The shutters here are wooden, matching the horizontal strips around the kitchen cabinets. Several geometrically shaped succulent flower pots match the backsplash, forming a perfect modern pattern.
9. This yellow L-shaped kitchen with breakfast bar is equipped with a matching yellow refrigerator.
10. Decorate the blank kitchen walls with some printed art, which is also a good way to mark dining spots.
11. Even if the counter extends beyond the "L" here, it is added to the overall design because it brings ingenious inspiration to the L-shaped kitchen with corner windows.
12. The display of decorative wood board is a beautiful and suitable terminal.
13. There is a luminous wooden slit between the crisp white cabinets, which looks clean and inviting.
14. Build a squatty vacant storage space in the L-shaped wall cabinet. For example, this white frame kitchen design with wooden color.
15. The wine cabinets standing high in this black kitchen are sure to delight the guests!
16. Large plants are placed on the edge of the L-shaped kitchen. The LED-lit bookshelf brightens the wooden functional wall.
17. Another wine rack in the L-shaped kitchen with a peninsula.
Ordinary sink, also known as drawn sink, is formed by pressing and stretching a whole piece of steel plate.
The principle is similar to balloon blowing, so the bottom and corner of the water sink will be thinned properly,
usually made of 0.8mm thick steel.
The Handmade Sink is not made piece by piece by hand, but made by cutting, bending and laser welding the steel plate.
Will not change the thickness of the steel plate in the corner, the sink is very sturdy and solid. Usually this thickness is 1.2-1.5mm.
The appearance has strong sense of line, and the weight is much heavier.
The small R angle of handmade sink is not only better in appearance, but also higher in the utilization of the whole sink space.
1. X Grooves Design
Optimized bottom slope makes kitchen sink draining faster than normal sinks. Gently sloped bottom, fast draining and dry after using.
Handmade X grooves design, not only increase the design aesthetic but also easy to drain water in a minute.
Rear set 3.5”drain matches most kitchen appliances and fits the most Common Garbage Disposal System and unlocks extra space.
2. Nano Surface Technology
Nano surface as Lotus leaf. Water and oil flow quickly and no trace left.
Hardness of Nano surface: >8H Hardness of regular surface: >4.5H
Extreme craftsmanship focuses on every detail of the sink. Meets the UPC, cUPC, CE certification standards.
3. POSCO 304 SUS Material
Durable scratch and stain resistant stainless steel surface helps the beauty last.
Real 16 / 18 gauge material; never chip or crack. Commercial grade satin finish. Thick 304 Stainless Steel construction.
9 - 10 inches deep large sink can hold a lot of pots and pans. Experience the luxury brought by the global high-end manufacturing industry.
4. Soundproof Pad - 7pcs
Extra-thick coating and thick sound rubber pad assure exceptional noise reduction.
Insulative padding can dramatically reduce the noise causing by water dripping,making an excellent effect on noise elimination.
It can enhance the elegance and high quality of the kitchen, and it will become the focus of your kitchen. The high quality of the sink is praised and recognized by the most demanding customers
Some faucets are used two or three years, and the water flow is intermittent or rusted into green. The handle is hard to be used for opening and closing. The size of the water flow depends on luck.
Some faucets have been used for 20 years, and the surface is still as smooth as new. The feel when adjusting the angle of the handle is still as silky as the chopsticks in a honey jar. The speed of the water flow are still adjusted as you like. So how can we pick a faucet that can last 20 or 30 years or more?
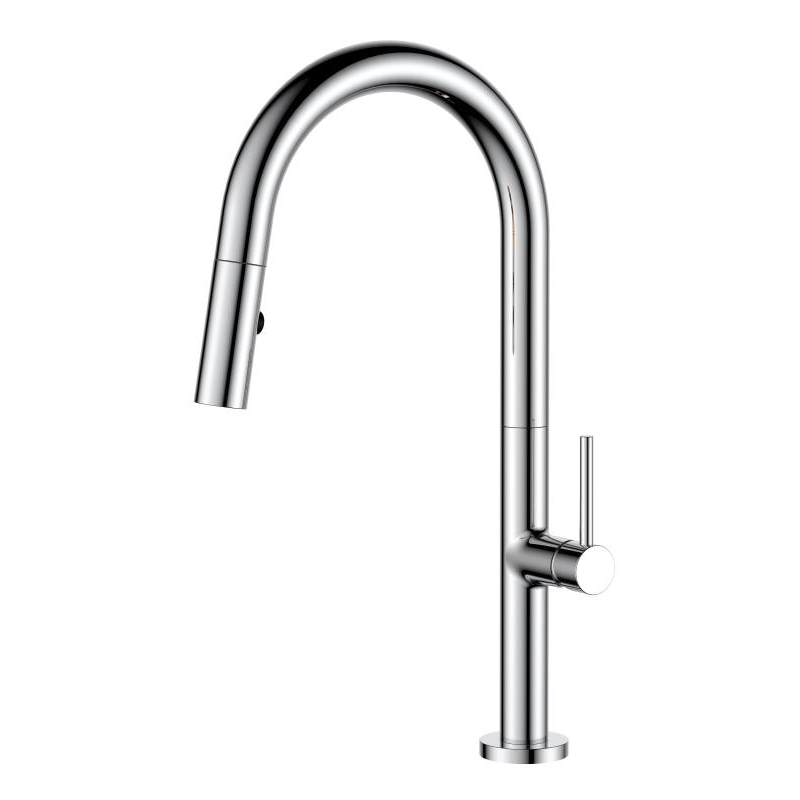
First, the kitchen faucet can be rotated 360°.
For ease of use, the kitchen faucet should be taller, and the spout should also be very long. It is best to extend above the drain and not splash water. If there is a hot water line in the kitchen, this type of faucet should also contain hot and cold hoses. In order to meet various needs, most of the kitchen faucets can rotate the body of the faucet left and right. The sprayer part of some faucet can be pulled out, which is convenient for cleaning to all corners of the sink.
Second, if the budget is enough, the material of stainless steel is preferred.
The material of kitchen faucet is generally brass, which is the most common faucet on the market. However. Due to the characteristics of the kitchen environment, pure brass faucets are not necessarily the best choice. All pure brass faucets have electroplating on the outermost layer, and the function of electroplating is to prevent corrosion and rust of the brass inside. There is a lot of oily smoke in the kitchen, and the greasy hands and cleaners on the hands when washing the dishes make it often necessary to clean the faucet. If you do not use the correct way to clean, it is likely to damage the electroplating layer of the faucet, causing the faucet to be corroded and rusted. If you want to choose an all-brass kitchen faucet, you must be sure to have excellent electroplating, otherwise it will easily cause the faucet to rust and corrode.
And now some manufacturers use high-quality 304 stainless steel to make faucets. Compared with pure brass faucets, faucets made of high-quality stainless steel are free of lead, acid, alkali, corrosion, and harmful substances, and will not pollute tap water. This is very important for drinking water in the kitchen; and the stainless steel faucet does not need electroplating, it is extremely difficult to rust, and the hardness and toughness are more than twice higher than that of brass products, so it is very convenient to clean. However, due to the high difficulty of stainless steel processing, the current high-quality stainless steel faucets are usually relatively expensive.
Third, pay attention to whether the length of the tap can clean the sinks on both sides.
When buying, pay attention to the length of the basin and the faucet sprayer. If it is a double sink, pay attention to whether the length of the faucet can clean the sinks on both sides when rotating. Most kitchen faucets can rotate the body of the faucet left and right, which is convenient for cleaning to all corners of the sink.
Don't think that after the new house is renovated, it will be as pleasing as the propaganda album. After the new house is renovated, a large amount of decoration waste will be generated. Dust, stains and marks from the decoration will be left on the walls and glass. Just like a baby who was just born, she will have a cute appearance after washing and putting on clean clothes.
Cleaning the newly renovated new home is an important task after decorating the new home. It is also the most laborious task. Facing a messy and unstructured new home, you don’t know where to start. Summarize the first cleaning experience after the renovation. We hope it will be of reference significance to you.
01 Cleaning Service
Those who are clueless about the cleaning of a new house can choose the cleaning service of a housekeeping company. Housekeeping companies have their own routines and tools for cleaning work. It is also a way to hand over professional cleaning work to them. The premise is to choose a qualified and high-quality housekeeping company. Services include: house dust removal, cleaning up decoration garbage, wiping glass, cleaning the floor, decontamination and disinfection of kitchen and toilet, cleaning up decoration traces, etc.
Notes on cleaning service
1. Organize a list of cleaning precautions, and list some areas that need special cleaning to avoid omissions. The decoration materials of each family are different. It is necessary to tell them some precautions, such as which places and areas cannot use water or chemical cleaners. These need to be communicated clearly with the housekeeping company before starting work.
2. Clearly state the materials of walls, floors, furniture, etc. that need to be cleaned, and let the staff prepare appropriate cleaning tools.
3. Communicate clearly about the tools needed for cleaning, which are brought by the staff and which are prepared by us.
4. Communicate clearly on the disposal method of the cleaned up waste, whether to throw it away or keep it somewhere.
5. Supervision, including whether to do a good job in dust prevention and cleaning of dead ends.
02 Clean Up by Yourself
Some people are unwilling to hand over their new homes to strangers to clean up, so they do their own cleaning work. Cleaning in person is nothing more than two things: preparing tools and clarifying the order of cleaning.
Preparation of Tools:
1. These will be used to clean the wall.
Small brush, sandpaper (to polish the paint on the wall), shovel, glass spatula, wet paper towel (to wipe the wallpaper), ladder.
2. These will be used to clean the ground.
Vacuum cleaner, mop, broom, nano sponge, rag (use a discarded old bed sheet; the size can be cut at will. It is big enough), dust cover, garbage bag.
3. Protective Equipment
Shoe covers, gloves, aprons, masks.
4. Cleaning Utensils
Detergents, maintenance agents, disinfectants, glue removers.
Cleaning Order:
Cleaning follows the order from top to bottom and from the inside to the outside.
Start cleaning from the room first, and then go to the kitchen and living room. The bathroom can be placed last, because the bathroom is a place where water is used repeatedly during the cleaning process.
Like kitchens and bathrooms, where there are wall tiles, they need to be cleaned from top to bottom to clean up the gaps in the tiles and the paint spots and glue stains on the surface.
03 Cleaning Techniques
During the decoration process, many traces of material adhesion will be left, and some cleaning skills are required.
Tape print: Use a damp cloth to wet it for a while before wiping.
Paint traces: Use paint remover or turpentine.
Marker marks: Wipe with a rag or damp paper towel with some alcohol.
Tile stains: Use special detergent for tiles to clean, paint and drawing pen fluid can be cleaned with turpentine, pyruvic acid or alkali.
Cement on glass: If it is a small cement stain, wipe it with a damp cloth and then scrape it off with a spatula. If it is a stubborn and large cement block, you can use the toilet cleaner to remove it. The effect is very good.
Tips: The toilet cleaner is acidic. Wear gloves when using it and don't think that the toilet cleaner is effective in removing cement and use it on tiles and marble floors. In addition, do not use alkaline soap at the same time when removing the cement on the glass.
04 Cleaning Can Be Done Separately.
In fact, if the new house cleaning work is done step by step during the renovation process, the subsequent cleaning will not be so laborious. Separate the cleaning work to these renovation steps:
1. After the water supply line and electricity are completed, and the walls and ground are leveled, the whole house can be cleaned and clean up the discarded decoration garbage.
2. When laying tiles, remind the workers to wipe off the cement stains on the surface of the tiles after laying the tiles.
3. After painting the wall and floor, you can clean it again.
If you have other new house cleaning experience, please leave a message to share with us.
Ceramic sink is a kind of household goods. There are many kinds of sink materials, such as cast iron enamel, ceramics,
steel plate enamel, artificial stone, acrylic, crystal stone flume, etc. Most bathroom sinks are made from firecaly.
Ceramic sink is a kind of water sink which is made by integrated molding and firing. Its main body is mainly white.
It has the advantages of high temperature resistance, easy cleaning and aging resistance.
It can be wiped clean with cloth or clean metal ball in daily cleaning.
Step Ⅰ. Grouting
The production of ceramic sink is generally made by grouting.
The slurry is poured into a fixed die and allowed to solidify.
Step Ⅱ. Spraying Glaze
It is necessary to prepare qualified glaze slurry. Spray it on the surface of sink body.
Vitrify it into porcelain after firing; cover it on the surface.
Step Ⅲ. Forming
Forming is a drying process.
The process of further dehydration of semi-finished products.
Step Ⅳ. Preparation for Furnace
This is an important step before burning.
Workers need to check the surface & quality of the sinks and lay them together in trolley.
Step Ⅴ. Burning
Put the products on the kiln car according to certain proportion.
Based on the given temperature curve, sink will form finally.
Step Ⅵ. Storage & Logistic
With the development of storage & logistics industry,
we developed a complete solution for big size cargos.